
Finish ROB RUN’s introductory quests, then visit Lenny at the Motel before your first trip into Looty Bay. Start with a short looting trip and learn how selling valuables works before spending money on equipment. Check what you can lose in your chosen role before carrying valuable gear into the city or desert.
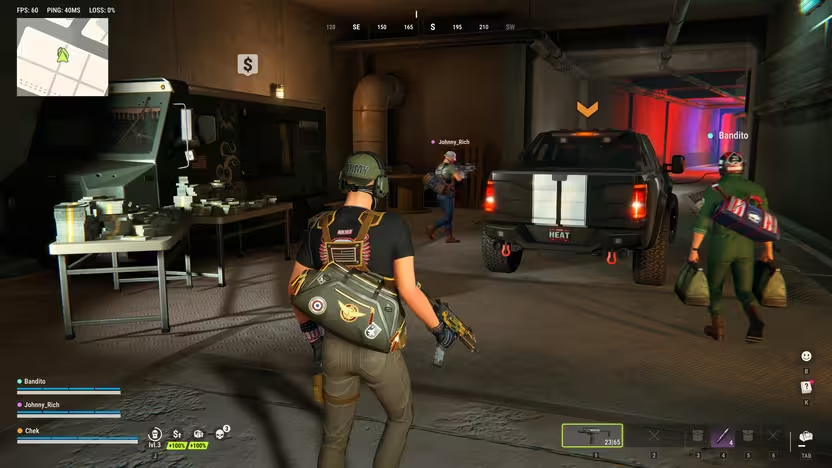
If you’re playing alone, follow the solo guide for a first route from the Motel to a Fence and back.
Open the in-game Codex
Press K with the default PC controls to open the Codex. Use it to look up the rules for player roles, death, police duty and settlements. If K does something else, check the binding labelled Open Codex in Controls. Raison Detre · Wikily Codex
To change your character name, speak to the Tattoo Artist in Prison. Your name carries over through a Federal Raid, so you can visit the artist when you are next in Prison. If you return early using Surrender to Feds, read the confiscation warning before confirming. The published update gives no rename fee or cooldown. See the Federal Raid and surrender guide. Kefir · November 11 update · Tpose Gaming · Prison and surrender screens · Kefir · Federal Raid
Where to heal
Use an AFAK to restore health on a run, or a wall-mounted first aid station when you have access to one at a base. The November 6 client reference lists the AFAK at 100 healing with a 9-second use time. The same reference lists research in Shipments and a Black Market purchase route, so consult the Black Market guide if you need to find the shop. The wall station can also serve as a respawn point in your settlement. AFAK data · Base first aid
With default PC controls, open your inventory with Tab or I. A recorded guide explains how a Pouch lets you put healing items on the quick bar, where you can use the Quick Slot bindings shown in Controls. The AFAK clip covers research and describes the timed use, so follow the item prompt in your own game for the final activation. PC controls · Pouch at 4:50 · AFAK at 2:13:00
The documented PC defaults assign 3, 4, 5 and 6 to Quick Slot 1 through 4. Check Settings → Controls → Key Bindings if you have changed them. Once you have the AFAK in a slot, look for its on-screen use prompt. Raison Detre
Stop moving before using an AFAK. The November 6 client data lists a nine-second use time and disallows use while moving. If the Black Market listing is locked, check the city medicine seller: the client references list it as another purchase option, with a price of 1,500 before discounts. See the Black Market and Shipments guide. Wikily · AFAK · robrungame.com · Client data
If AFAK is locked in Shipments, check your settlement tier, accumulated jail time and whether you have researched Painkillers. The November 7 client catalog lists Tier 1, five years of jail time and 5,000 cash for AFAK research. The Trade Laptop then lists a separate purchase price of 500 cash before discounts. See the Federal Raid guide for how jail time carries over. robrungame.com · AFAK unlock data · Wikily · AFAK client data
If you can’t research the AFAK yet, look for a medicine trader at Pharmacy: East or Pharmacy: West in Looty Bay. The November 12 shop data lists the kit at both pharmacies, and the item data lists no settlement tier requirement for the city trader. Use the Looty Bay map to find the closer pharmacy and check the trader’s offer when you arrive. Shop data · AFAK
Finish the introduction and meet Lenny
The fan wiki places the introductory quests before the main sandbox activities and recommends speaking with Lenny to learn the core mechanics. A player walkthrough describes the opening hotel as a safe zone and identifies Lenny as its owner, directing newcomers toward Looty Bay. That safe-zone description belongs to the demonstrated test build; use the opening instructions in your session to orient yourself.
The official Steam description identifies both cops and criminals as human players with their own agendas. It also explicitly allows finding another approach when an open fight would be too dangerous. Treat that as permission to reconsider a confrontation, rather than assuming every encounter requires shooting, and avoid extending the player-controlled description to every shopkeeper or other person you meet.
Try a basic looting and selling trip
A beginner test-build walkthrough demonstrates searching rubbish bins to collect starting funds, using a held E key for the search interaction. The player finds cash and mentions laptops and toasters among possible finds, without establishing drop rates or a fixed return. This gives you a documented activity to try, but check your current interaction prompts before relying on the recorded control.
For selling valuables, the fan wiki identifies a fence at a dollar-sign-marked van in Looty Bay and the Sales Center. The walkthrough says selling to the fence requires becoming a criminal and demonstrates holding F to switch. It then shows a return toward the hotel through the city's road exits, a route example that does not guarantee you will avoid arrest along the way.
After the intro quests, visit Lenny at his Motel and choose one short task. POACH’s guide describes finding the Fence, taking the cash and leaving the city to finish the trip. Plan how to get back before taking more loot.
If you want to spend that first payment on gear, check the Black Market guide for Lenny’s purchase options. (Kefir Help Center · video at 0:24)
Separate equipment unlocks, purchases, and cash storage
Watch for a distinction between unlocking equipment and actually buying it: a test-build equipment walkthrough unlocks a sports bag before purchasing the bag itself. The same walkthrough shows Black Market categories for equipment, vehicles, and construction, with ammunition, medicine, grenades, and light protective equipment among the examples. Use those examples to recognize the shop's scope, while checking the current purchase screen for what an unlock actually provides.
The fan wiki lists city loot and Black Market purchases through Lenny or a base laptop as ways to obtain weapons. For cash, the test-build walkthrough also demonstrates a storage interaction at the hotel that accepts money only. Keep those functions separate when planning your return trip: the demonstrated cash stash is not evidence of storage for keys or every other item in your inventory.
Understand losses before choosing a role
According to the fan wiki, criminals who die in Looty Bay lose their inventory, while civilians who die in the city retain bag contents and equipped gear. That is a location-specific rule from a third-party guide, not a promise covering every part of the map. The same wiki says dying in the desert costs players all their loot regardless of role. Do not carry the city's civilian protection into your expectations for a desert trip.
Arrest and death also need separate treatment when you decide whether to keep fighting. The fan wiki describes surrender to police as a way for criminals to preserve equipped gear. A test-build walkthrough similarly says arrest keeps equipped items but costs the contents of your bag and car trunk. Neither account promises that surrender saves every category of property, so preserving equipment should not be confused with preserving the entire haul.
Prepare a robbery before starting it
The fan wiki recommends scouting a target and planning the getaway route before beginning a robbery. It describes putting on a mask as becoming a criminal and enabling robbery activities in Looty Bay. The wiki also says leaving Looty Bay clears criminal status and allows a fresh role choice on return; treat that as third-party guidance to check against your current build.
Alarm handling deserves attention: a house-robbery video begins with disabling an alarm, while another test-build walkthrough records an alarm sounding during a robbery. Both the robbery video and fan wiki describe holding occupants or staff at gunpoint to stop them calling police, which does not establish control over every alarm source. The video also suggests hiding in a closet if police arrive, without guaranteeing concealment; with teammates, the wiki recommends dividing entry, carrying, and covering duties.
Consider police work as a starting activity
The fan wiki describes joining the police at Looty Bay Police Station when an officer slot is available, followed by receiving standard equipment and a patrol vehicle. It lists fighting crime and confiscating contraband as ways to earn a police paycheck. Badge progression can unlock improved equipment, according to the same guide, but department-issued gear is lost on death while personal items and equipment are retained. Consider this an alternative activity with its own availability and loss rules, rather than treating issued equipment as permanently yours.
Learn banking and base requirements
The fan wiki describes opening a bank account at Looty Bay Bank as a civilian, laundering funds at your base, and withdrawing cash through an ATM. These are distinct banking actions, so identify the relevant service before assuming the hotel's cash storage does the same job. For establishing a base, the wiki says to find an owned settlement, locate a vacant plot, and pay rent through the sign beside it.
The official description says hideouts can be built and upgraded, with storage for loot and vehicles plus workbenches and safes. It also warns that a more lavish refuge attracts more intruders, so storage should not be understood as absolute protection. The fan wiki describes security fuses as making hacking require more time and resources, and defense modules as alerting allies during an attack, without promising an unbreachable base.
Choose your next direction and expect change
Beyond the opening route, the fan wiki lists heists, cargo hauling, base production, police work, and territory fighting as starting directions, without establishing a highest-paying choice. The official description allows solo survival and presents families or clans as ways to assign roles, organize raids, and pursue territory together. Choose an activity you want to learn before assuming that joining a group or immediately attempting a larger robbery is compulsory.
The Steam description frames progression around building up within a week and then starting over, establishing a server-wipe context without specifying everything that resets. Its Playtest listing also describes requesting access and waiting until the developer is ready for more participants, which does not confirm immediate entry or current availability. Between access conditions, wipes, and the developer's warning about ongoing changes and possible bugs, keep your expectations tied to the build you can actually enter.